Tag: activities for toddlers

Making Learning Fun with Panda Post Learning

Making Learning Fun with Panda Post Learning

I love it when I get to work with brands that are so aligned to my parenting style and philosophy. The second I heard from Nina I was so excited to jump on board with Panda Post Learning. My blog has always focused on fun learning ideas and activities to do with your kids. Its more than just chucking an activity in front of them and expecting them to do it, it’s about doing it together and spending time with your kids. I wrote a blog post a little while ago on how being back in an office environment (as opposed to a home office), I was battling with guilt while the kids were on holiday. They are too young to just drop off at holiday classes, and I certainly didn’t want them just watching TV the entire day, so I created a few set up in advance activities for the kids to do in the day.

Enter Panda Post Learning, it’s like Nina read my mind 😊 Panda Post was born to empower parents to make learning through play easy and fun! Helping parents to reduce screen time and increase play time. Each month a new theme is announced. Age appropriate boxes are available for children from 9 months to 6 years old. Select a box according to your child’s’ age (Baby Box,Toddler box, Playschool Box, Preschool box) and receive your box by the 20th of the subscription month, it’s that easy!
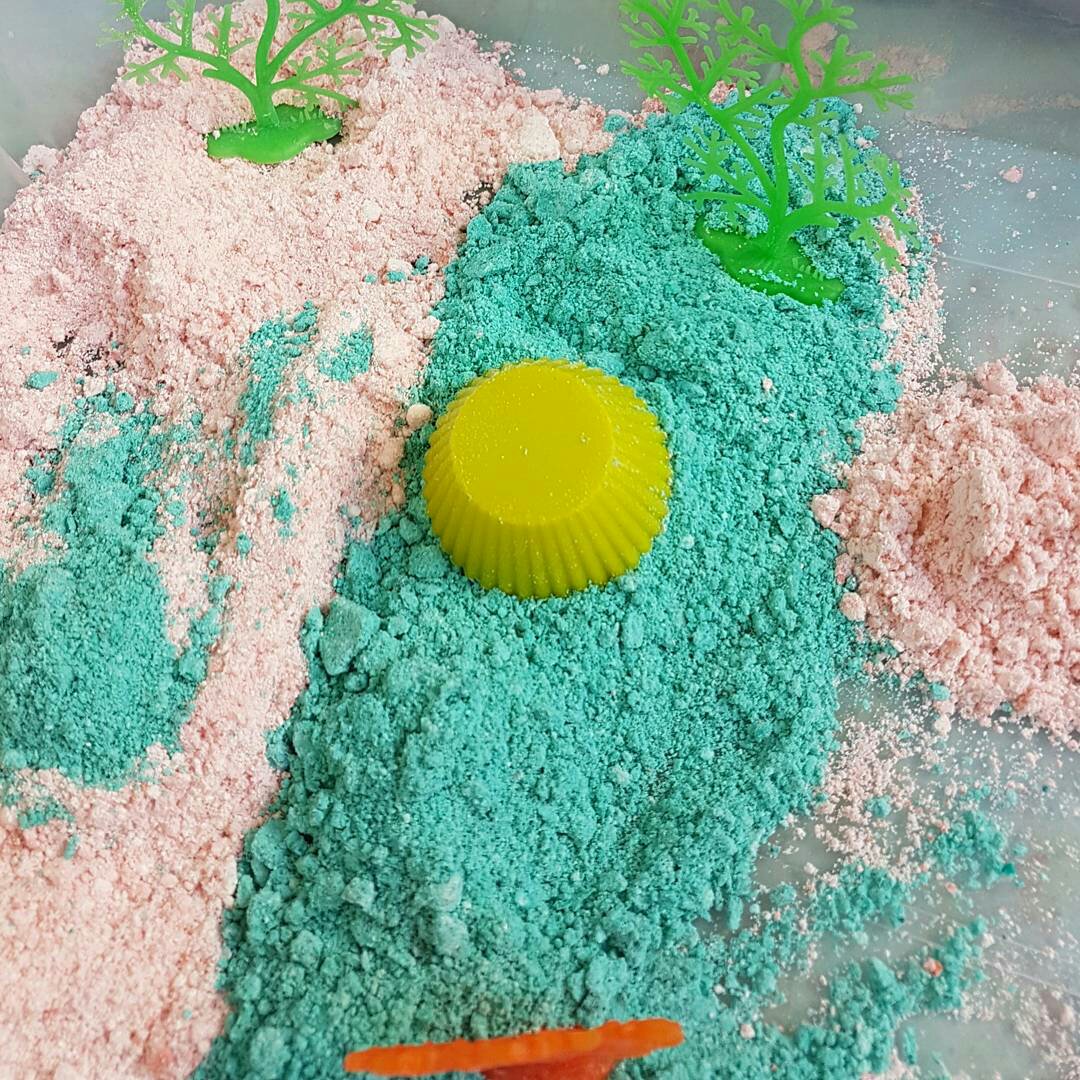
Our September box arrived, and the boys thought it was Christmas. They went crazy opening it up before I even got to take a few good pictures. I went for a combination box of both preschool and playschool and the boys are 3 and 4. When you receive your first Panda Post you receive a few “extras” that wont be included every time. Basics like scissors, glue and crayons to get you going on your arts and crafts journey. Our box had a healthy mix of art and crafts coupled with some puzzle games to encourage thinking (my boys are still getting frustrated with lining up the dots) and a fun ball catch kit to encourage gross motor skills.

A thoughtfully typed out description and activity list was included in the box, breaking down the activities step by step, making it super easy for your caregiver or nanny to do if you happen to be at work. Our box was “Spring themed”, so naturally the focus was on flowers, butterflies and birds. I honestly found the box jam packed with different options, we still haven’t gotten through half of them! We have created butterfly shaped suncatchers (something I always wanted to do but always forgot to buy contact paper), peacocks, owls, pet rocks. We have hunted for bugs and butterflies (and now have an earthworm living in sand stored in a container). We’ve spoken about spring and growth, planted seedlings and painted pots!

I only blog about products I believe in, Panda Post Learning is supporting a local, proudly “mumtrepeneur” business and is making my life a whole lot easier. My eldest comes at the weirdest times of day with a head full of ideas of what to craft, Panda Post sends you everything you need. No running to the craft store at inconvenient times because you don’t have one thing that you need.

I have literally just received an SMS from our playschool reminding me about the upcoming October break (yes I had forgotten about it), so guess who is hopping onto the website to order the beach themed October box…

You can find out more about their subscription boxes on their website .

20 Outdoor Activities To Do With The Kids

20 Outdoor Activities To Do With The Kids

Yaaay for warmer days and longer hours of sunshine. I’ve missed outdoor activities with the boys so much and in the past two weeks every day after work we try to fit in some “play time”.

Most of these can be done in a smaller outdoor area, so if you’re in a high rise with limited balcony space, worry not! You can still get creative.

Here are my favourite outdoor activities to do with kids:

  • First and foremost, I just like to sit back and observe. Let their imaginations work. Get them outside and let them make their own fun. On their own accord they have been countless hours “building” forts, making houses behind trees, turned into imaginary chefs mixing up soup with leaves and their ultimate is to pretend they are gardeners. Whilst I’m a huge advocate of doing things with them, trust me, my absolute number one thing to do is just to let them do their own thing. It’s a magical thing to watch.
  • Set up a “Mud Kitchen”- All kids, no matter what their gender love to spend hours mixing and creating. Give them a couple of old bowls and spoons with a jug of water and some soil and you’ll be amazed at the creations put in front of you to sample.
  • Paint with Ice Lollies – a lot of my outdoor activities include paint, because to be honest, I much prefer the kids painting outdoors than in, in the interest of keeping my walls and floors paint free of course. This is super easy. Mix a little paint with water (you can also use food colouring and water) and pour into an ice container. Once the cubes are partially frozen add in your Popsicle sticks and take out when completely frozen. Yes it’s just paint, but it adds a completely different dimension and texture to painting.

  • Paint with Nature – Spring time with all the flowers out is the perfect time to do this. Grab a few flowers, leaves and sticks and get the kids to paint with them. Observe the patterns they all make and which ones are easier to paint with.
  • Pack up your lunch and take it outside. Most kids adore picnics, so instead of sitting inside to eat, grab a blanket and take it outdoors for a bit of an adventure
  • Set up a mini Olympics – This really doesn’t have to take too much thought or effort. We have used things we have around the house. Examples include: drawing a target circle on the wall outside in chalk, get the kids to try and hit the targets with a ball or bean bag. Tying a hoola hoop onto a tree to create a ring to throw through. Place cones out and create a mini obstacle course to run and jump through.
  • Build a Fairy House – Using popsicle sticks, sticks, matchboxes, moss, leaves, and small items from inside your home to build a fairy-sized house.
  • Build a Bug Hotel – My husband hates this one but the boys love it. Find any interesting artifacts lying around. Old bricks, pipes, pots with holes and rolled up newspaper work really well. Layer with straw and leaves to create mulch and make a really interesting little “hotel” for bugs to make their home in!
  • Go on a bug hunt – Look around said hotel 😊 Take a magnifying glass and create a list of possible bugs in your garden. Encourage the kids to look under pots and logs to try and find the bugs
  • Create a scavenger hunt – I like hiding figurine animals around the garden for this one. You can use a magnifying glass or make a pair of binoculars out of toilet paper rolls. Hide your mini animals all around the garden and let the kids find them.

  • Create a wash station – whatever it is, be it windows or bikes and cars. Get kids involved with a sponge and some soapy water and they are in their element. My boys love washing their bikes, or my windows and ultimately it always turns into a wet, messy affair. You are outside, so its OK 😊 
  • Make some bird feeders – Out of pine cones, peanut butter and bird seed. The kids will love making their own feeders and will often keep checking to see if birds come to feed.
  • Paint Stone Pebbles – My boys loved this ! Collect medium-sized stones and arrange them in the garden. Get your kids to paint the stones with acrylic paints of different colours. They can paint anything they like from shapes, to pets and insects. Mum can come in after and draw in any finer details.

  • Create Giant Bubbles – Bubbles are one thing I despise doing inside. The sticky bubbles pip all over the tiled floors leaving a slippery, sticky mess. Outdoors is the perfect place to create bubbles to your hearts content. To make the giant bubbles add one cup of dishwashing soap to a litre of warm water. An extra two to three tablespoons of glycerine, (makes your super big bubbles). Pour your concoction into a flat, rimmed tray, like a sheet-cake pan, and dip in a large DIY wand, made by bending a wire hanger into a loop. Lift the wand slowly and walk backward to let loose a gigantic bubble. Experiment and try different mediums, a fly swat perhaps with large holes. The crazy store has a lot of possible options to use.
  • Collect flowers and leaves and make a magic potion – Using food colours and petals let your kids mix away and create any “magic potion” they desire. I love the pretend aspect here.
  • Sensory Trays – If you have been following my blog for a while you know I’m a HUGE fan of Sensory boxes. Why not make some foam soap, a slimy swamp or a sandbox sensory tray with cloud dough? The possibilities are endless and being outdoors or on a balcony means easy clean up!

  • Go crazy with chalk – I must admit I LOVE chalk. It’s the one time my boys are allowed to draw all over the walls and floor. If we are outside of course. We love to colour in bricks and then find things around the garden to match the shade of brick, or just graffiti the driveway up. Whatever it is, it only takes a rain shower or sprinkler to wash away. Easy clean up!
  • Create a Nature Weave – We have been meaning to try this for ages and it looks pretty simple! You will need to find 4 pretty straight twigs to bind together into a square shape. Take some string (or you could even use bits of palm leaf) and weave close together to form a weave. The kids can find flowers, leaves or any interesting objects in the garden to thread through the “dream catcher” or “Nature Weave”.
  • Make a Water Wall – We have done this a number of ways and its so easy and very educational for little toddlers. The easy way would be to cut out scoops from the middle of plastic bottles. (I used 500 ml water bottles as well as 1l and 2l soda bottles. Attached them to the wall in a descending order, I just used tape as It was a makeshift one. Give your kids a scoop or jug to pour water into the top container and watch in amazement as the water flows through ! My dad then got involved and make the most awesome water wall out of PVC piping for the boys. If you have a good hardware store close by it shouldn’t be too hard. Place a tub underneath to collect all the water and let them play!

  • Make Ice Fossils – One of our all time favourite activities. Take any small figurines you may have around the house; we have used “dinosaurs” for dino eggs as well as marine life. Put them into an empty water balloon, fill with water and tie. Freeze the balloons overnight and then cut off the balloon cover. Place out bottles with water, plastic syringes and chipping hammers and let the kids try to uncover their fossils in the ice !

Cloud Dough Sensory Tray

Cloud Dough Sensory Tray

Its been a while since I’ve posted a sensory craft and to be honest I’ve missed the time with my boys. They get so excited when mama pulls out the activity tray and want to help with everything.

At a recent Prima Toy Event on of my favourite toys that launched (stay tuned for a full list of my favourites), was the Treasure X box. A little box filled with adventure and you have to try and retrieve the “lost” bits and pieces by digging through the “soft brick” around it. It reminded me of the some of the sensory activities Id done with the boys around dino excavations and got me thinking it was time to do something new.

Cloud Dough is a perfect base for sensory trays. It’s both mouldable and crumbly at the same time. It has a silky soft consistency perfect for little hands. You can see my previous recipe here, but generally I take about 8 cups of flour to one cup oil (vegetable or baby), this time I added in a few drops of essential lavender oil to add in a calming scent. The mixture of flour and oil is mixed to the consistency of a wet beach sand. It’s the perfect exploratory material for toddlers to play with and is 100% taste safe! The boys are at a fun age where I can start making sensory trays a little more challenging. So with this one, inspired by Treasure X, I made it a pirate theme and hid bits of metallic treasure into the “sand”, they had to find the treasures with a magnetic wand. Add in a couple of scoops and forks and use little shells or containers to mould your shapes. To create a pirate theme i took “treasure” from around the house, glass pebbles and sparkly pom poms as “gems”, plastic beads, gold coins, old treasure chests and pirate figurines.

Most of the time was spent burying their own treasure chests in the sand, acting out with the pirates before creating sand castles and shapes with the easily mouldable cloud dough. After about 45 minutes of beach play we packed away our cloud dough into an airtight container to be played with another day. Cloud dough typically has quite a long shelf life if stored correctly.


Have fun with your little pirates and never be afraid to get a little messy xx

Montessori Inspired Activities for Toddlers

Montessori Inspired Activities for Toddlers

I’m a huge advocate of Montessori, in particular in the early learning phases of a child’s life. They say people come into your life for a reason and my friend Mandy did just that. A trained Montessori teacher, Mandy opened up my eyes to learning and development in children. We used to have the most fantastic mum and toddler classes all in a Montessori environment and my little one thrived.

I’ve put together my top Practical/ Life Skill Montessori activities. These are specifically tailored for toddlers aged about 15 months to about 3 years old I would say and  have literally saved me on so many occasions, when I just need 10 minutes. My boys really focus and get involved in the tasks. Most of these materials you would already have either in your Kitchen or Bathroom and cleaning up is a breeze (in fact the kids should do the cleaning up through play).

Montessori activities are life-based. They help children build skills for everyday life,  building upon the necessary foundations needed in academia. Most of Montessori activities are done on a tray. The purpose of having a tray is to concentrate the child’s attention on one activity, to isolate distractions and in a typical Montessori school a child will select their own tray from the shelf, and put it back again after.

Here are 5 quick and easy Montessori activities to keep a toddlers learning mind busy. 

Basics you’ll need are:

A large tray/ sensory bin

Two similar sized bowls

Shaving cream

Spray Bottle

An empty bottle

Straws

Kitchen Cloth

Sponge


Spray Bottles

These should be a staple in any toddler household. The trigger action is great for development and coordination and the wiping motion helps them cross the midline.  Get your toddler to spray a large window or mirror and wipe it up after. Crossing the body’s mid-line is an important developmental skill needed for many everyday tasks such as writing, hitting a ball with both hands etc.

Shaving Cream Fun

Want to keep a toddler busy for at least 20 minutes? Give them some shaving cream ! The possibilities are endless and as your kids get older it really aids in writing skills as well. I digress, if you have a big window or mirror spray a little cream onto the surface. Taking a plastic fork, or their finger, let your toddler draw designs through the cream. Afterward get them to wipe the surface down with the cloth.


Sponging and transferring water

Sponging is one of the first basic lessons a child learns in an Early Childhood Montessori classroom.  It works on fine motor development, focus and concentration. They also indirectly learn about absorption. Take two bowls and place a little water into one. Your toddler must place the sponge in the bowl with water and transfer and squeeze the water out into the other bowl until the activity is finished. Then complete moving the other way.

The Spooning Exercise (Transferring)

This activity saves me on a weekly basis. Cooking in the kitchen and have a toddler in your hair? Stick two bowls in front of them and let them work. It develops control and movements in your toddler, learning independence and concentration. ALL toddlers LOVE sorting and I vary this activity with different ingredients. Flour is a favourite but we also use lentils, dry beans and popcorn seeds. In one bowl pour in your ingredient of choice and give your toddler an appropriately sized spoon. My boys are so careful to try and ensure each and every lentil falls into the bowl and they dont stop this activity until each piece has been transferred.

Placing Straws Into A Bottle

This activity is actually perfect from as young as 12 or 14 months old. As your toddler gets older you can also add in a degree of complication by adding in varying factors. For example: Adding in pipe cleaners and sticks to the tray, your toddler must sort them out and ONLY add the straws to the bottle, or get them to list the colour of each straw the place in the bottle. As with each of these activities you’ll have to show your toddler what to do first and then let them take over.


Toddlers from about 14 months onward are probably at my favourite age for learning. Everything is fascinating and exciting. These activities are great for calming kids and encourage independent learning. I’ve got a whole lot more to share but I hope these simple activities will inspire you to get your child involved in daily activities around the home. What are your favourite activities?

Fizz Dough Recipe

Fizz Dough Recipe

A soft, fizzy dough to make sandcastles with the magically turns into a playdough consistency, this recipe literally has it all for kids and may just have become my favourite !

We started off by combining equal amounts of cornflour (cornstarch) and bicarbonate of soda. I was running out of cornflour so I think my Continue reading “Fizz Dough Recipe”

Edible “Pudding” Slime

Edible “Pudding” Slime

I did it! I finally got around to trying out this “slime” recipe and I am ecstatic, it is by far the most favourite one I have done. I say “slime” because it’s not really a “slimy” texture. It’s more of a super soft playdough, or a combination of playdough with the viscosity of slime. Continue reading “Edible “Pudding” Slime”

Slime Sensory Box

Slime Sensory Box

If you follow me on instagram you would have seen that this week we were given some awesome products from Zimpli Kids to try out with the boys.

Gelli Baff and Slime Baff were designed for bath time or water play. They are 100% Safety and dissolve away completely. Continue reading “Slime Sensory Box”

Edible Slime Recipes

Edible Slime Recipes

If you are a huge fan of slime like we are in our house, then you will notice that a large majority of the slime recipes do contain harsher ingredients like glue, detergents or borax. This can irritate little hands (though we have been fine) and its also crucial that this play should be supervised at all times. Continue reading “Edible Slime Recipes”

Perfect Puffy Paint

Perfect Puffy Paint

A while back I helped out at my son’s playschool and the theme for the week was “Night Sky”. I had so much fun researching and testing out activities and crafts to do with the kids.

I settled on two hands on crafts for the children, one being a galaxy playdough. It wasn’t just normal playdough, this one had gelatine cooked into it for a little extra stretch. Continue reading “Perfect Puffy Paint”

Cloud dough/ Moon sand recipe 

Cloud dough/ Moon sand recipe 

It’s been a while since we did this one, in fact shockingly, I don’t think I’ve ever made it for my youngest ! (Hides behind hands).

Moon Sand or Cloud dough as its sometimes referred to in the USA promises at least 40 minutes to an hour of exploration for my little ones. With a consistency similar to beach sand (obviously alot softer), the possibilities are endless. You can make cakes, or castles, pies or if you’re a mum of boys like me, everything turns into a quarry and the sand will end up being transported in dump trucks!

Its easy to whip up when your kids need some stimulation in the day, and we often use it to create a sensory tray and hide treasures at the bottom, little ones can then dig through the sand to find the treasures.

It takes less then five minutes to create and is made with ingredients found in your cupboard.

8 cups flour to approximately 1 cup of oil. You can either use a vegetable oil or baby oil. I’ve used both and obviously vegetable oil is safer with smaller kids. Just mix it together in a big bowl until its the right consistency, akin to slightly damp beach sand.

Have fun 🙂
Ps. Excuse the pyjamas I always like to do messy play in the mornings before we get dressed for the day 🙂